Search This Blog

Friday, February 4, 2011

Meat Grinding and Sausage Making 2011 - part 2


I was able to get back to the kitchen today and continue my meat grinding and sausage making projects. I had gotten the beef ground yesterday, and the first grinding on the lamb & various sausage mixes done the day before that.
Today I started with grinding again, getting the ground lamb finished followed by the second grind on all of the sausage mixes. Then it was time to start stuffing the sausage meat into casings.
Ground Lamb
When I talk about "casings" i mean, of course, intestines.  I buy two sizes of casings; 32-35mm hog casings for Italian, Hungarian, and Andouille sausages, and 23-25mm sheep casings for breakfast sausages and hotdogs.  They come well-cleaned and heavily salted in hanks of any number of random length pieces.  As a general rule you need about 2' of 32-35mm casing per pound of meat and about 3 times that for the smaller sheep casing.
 
 
In order to use them they need to be soaked to remove the salt and soften the tissue.  I've heard that putting a little vinegar in the water helps with the softening but I've never had trouble doing it without.  After a soak and rinse, each piece needs to be opened at one end and a little  cold water run into the opening.  The ball of water is then slid down the whole length of the casing by picking up the opened end until it runs out the other end.  This slicks up the inside so it is easier to  slide onto the sausage stuffer and ensures that there are no obstructions, knots or tangles. You want to work organized here so that all the different casing pieces don't get tangled together.  Leave them in the water with a small piece of one end hanging out of the water (so you can find it easily again) until you need them.
 
Here's my sausage stuffer.  It has a cylinder hopper for the meat mixtures and a hand crank that lowers a piston into the cylinder, that pushes the meat out of a hole near the bottom.  The hole  is fitted with one of several nozzles (different diameters for different sized casings).
 
Once assembled and the hopper filled, one piece of casing is carefully opened and slid over the nozzle until all of it is accumulated along its length except for the last couple of inches. If the casing pieces are very short you can thread several on at once. A knot is made in the end that was left hanging and then it is snugged up to the end of the nozzle.  There should not be any excessive air pockets or water left in the casing or it will make pockets in the sausage.


To make the sausage links, the crank is slowly turned with one hand.  As the casing fills, the other hand supports the sausage and slowly pays out the casing so as to regulate how much filling goes in.  Too much filing and the sausage will burst, too little and the casing will be flabby.  Depending on the types of sausage, the filling action is suspended periodically so that individual sausages can be twisted off.  The trick to this is to alternate each twist direction so the whole string doesn't unwind itself.  I know this sounds counter intuitive but it works.
 
Re-fill the hopper as necessary.  Once you get to the end of one casing, a knot is made at the end of the last sausage, the next casing is loaded on the nozzle and the process repeats until you're done.  Today, I got all of the sausages done into links except the hotdogs/wieners/frankfurters which still need to get emulsified tomorrow before stuffing into casing.
Italian

Hungarian

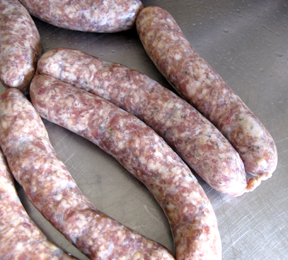
Breakfast
The sausages should, of course, get popped back into the fridge right away and eaten within a few days or packaged and frozen as soon as possible.

Thursday, February 3, 2011

Meat Grinding and Sausage Making 2011 - part 1


Yesterday I got a good start on all the meat grinding and sausage making I wanted to do this week. 
I got 60 lbs of beef, 40 lbs of pork and 24 lbs of lamb all run through the grinder the first time.  I grind all my meat twice, first using a die with 1/2" holes, then later with a smaller die (size varies depending on the use or type of sausage it is destined to become).
This time I was grinding meat from several different butchering sessions last summer and fall, so the meat had all been frozen.  I really like working with frozen meat for grinding because I can purposefully thaw the meat only part way before processing it.  The meat was perfect; pliable but still with lots of ice crystals in the muscle. Having the meat "hard chilled" makes it cut cleaner without mushing the fat at all and also counteracts any heat build-up from the friction of the process. Keeping the meat as cold as possible reduces the chance of problems from bacteria.
So, starting with 124 lbs of well-chilled boneless meat, cut into strips 1"x1" or smaller (any length), well trimmed of any sinew, silver skin, excess fat, glands etc. I set-up my meat grinder.  It's an attachment for my 20-qt mixer that is powered by the PTO (power take-off) hub on the front of the machine.  The grinder is basically a funnel for directing the meat to a screw drive that pushes the meat through a stationary heavy metal plate with holes cut in it.  A 4-bladed knife (which I sharpen regularly) rotates on the screw drive and against the plate, cutting off the meat as it is pushed out
Here are some pictures of the parts and assembly...
 

I set the mixer to a medium speed and, using the "pusher" started feeding meat, a little at a time, down the chute into the grinder.  The first grind is very easy and the meat practically flies through the plate into the waiting tub below. The meat is nicely cut into a very coarse grind so I proceed and process the all the beef, pork, and lamb in about 2 hours, immediately getting it back into the fridge as soon as possible.
 

After clean-up I still had enough time to make my sausage mixes. This week I'll be making 10 lbs of Andouille (a smoked Cajun sausage), 10 lbs Sweet Italian. 10 lbs of Fresh Hungarian, 10 lbs of Pork Breakfast, and 10 lbs of Hotdogs/Wieners/Frankfurters.
While the ingredients and ratios vary for the different sausages the method is the same for all: Measure the seasonings, mix them with a liquid, mix the seasoned liquid with the coarse-ground meat, chill thoroughly (preferably overnight), re-grind through a smaller die, stuff into casings (optional), smoke (if appropriate),  eat or package and freeze.


I got all of the sausage mixing done yesterday in anticipation of re-grinding and stuffing today but I wasn't able to get any of it done except re-grinding the beef for hamburger (and in time for lunch too!)
 

The rest of the sausage making will have to wait until tomorrow.  I hope.
If this whole grinding-sausage making thread bothers you, just wait...  Next week we'll be making some laws!

Wednesday, February 2, 2011

The Big Braise


Some days are just perfect for spending the whole day in the kitchen, making good smells and heating up the whole building with lots of cooking projects.  Today was just that kind of day. It was snowy on-and-off all day and cold (high of 15F) with gusty winds.  An excellent day not to go outside more than absolutely necessary.
In addition to starting the grinding and sausage-making work on 124 lbs of beef, pork and lamb (more on that soon) I had 4 very large beef shanks from a steer we'd butchered last summer that needed something done with them and I had pulled 4 lbs of cubed steak (from the same steer) for making a big pan of Swiss Steak.  Both would be braised dishes and the projects would mesh well so I got both going first thing this morning.
Mexican-style Shredded Beef
I decided to make Mexican shredded beef from the shanks so I heated some fat in my largest braising pan and seared each shank well on all sides.  They barely fit in the pan. When done I removed them to a 4" deep hotel pan and seasoned them well with salt, garlic and ancho chile powder.  Next, I rough-chopped 6 medium onions and poured them over the shanks and topped that with 1/2  of a #10 can of chopped tomatoes in juice then added about 1/2 gallon of water to the pan.

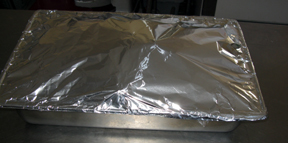
I covered the pan with plastic wrap, then sealed the pan well with heavy aluminum foil. I used the plastic because the acidity from the tomatoes would have eaten through the aluminum foil during the long cooking process, making holes and probably leaving a nasty grey sludge on pieces of my meat.  Steam from the cooking liquids will keep the plastic from melting.
The big pan of shanks went into my convection oven at 275F and stayed there, slow-cooking for about 8 hours.  It was hard not to peak at it because of the great smells after the first couple of hours.
When it was done I removed the shanks and meat (much of it fell off the bones when I touched it) to a sheetpan to cool, poured off the extra fat from the braising pan and deglazed it on the range with a little water. 
Once almost cool enough to work with I carefully picked through the meat, discarding sinew, cartilage and bone pieces, leaving just the dark, rich meat.  It will chill overnight to be shredded tomorrow.
The pan drippings went into the fridge to chill overnight.  Tomorrow I'll skim off any fat and combine the remaining liquid and braised veggies with the shredded meat, and pack it in zipper bags for the freezer.
Swiss Steak with Vegetable Gravy 
I took the 4 lbs of cubed steak, dredged them in highly seasoned flour and pan fried them in bacon fat until well browned.  While they were cooking I rough-chopped a few onions, half a dozen carrots and about half a head of celery.  When the meat was done I removed it to another pan, drained off the excess fat and sautéed the chopped vegetables with some leaf thyme, garlic and a couple of bay leaves.


Once the vegetables were soft I added a half #10 can of chopped tomatoes in juice and some water to deglaze the pan, scraping up all the nice brown bits that had stuck to the pan bottom.  When that was all bubbling nicely I added the meat back to the pan, added a bit more water to make sure the pieces were covered, turned the flame down to its lowest possible setting, and covered the pot.  I let it simmer for several hours, stirring periodically, until the meat was almost-falling-apart-tender.  By then the sauce had thickened nicely.  A few more minutes of cooking uncovered reduced it to exactly where I wanted it to be.

I chilled most of the Swiss Steak in the fridge, just keeping out enough for our dinner tonight, to be accompanied by some mashed russet potatoes.

Friday, January 28, 2011

Smoking Meats - Hot and Cold

Big smoking day today.  I have about 40 lbs of pork to smoke; about half of it hot smoked (2   shanks, 4 cappocolo, some spare ribs and a few chops) and half cold smoked (6 slabs of belly and 2  jowls for bacon, and another few chops) 
My hot/cold smoker set-up is a combo hybrid.  The hot box is fairly stock propane unit, off-the-shelf with the exception of the converted smoke stack.  The cold box is home-built from a 35-gallon galvanized trash can, some stove pipe parts (chimney), and some shelf brackets plus a length of dryer hose and a battery-operated fan from Radio Shack to pull the smoke from the hot box. The fan runs for a couple of days on 8 AA batteries.  It is switched(side of the battery box) but I've never cold smoked without it running so I probably could have skipped that additional feature.
I'll be smoking with hickory today so I get the chips soaking in the chip box.
I'll also be doing a moist smoke so I get my pan of water on to heat.  No sense in putting cold water in the smoker and having it take that much longer to get up to temperature.  I also season my water bath heavily with garlic, onions, hot peppers and a glug of cider vinegar. I'm not sure if it really imparts any flavor to the meat but it sure makes it smell great while cooking!
I drain the chips after about 15 minutes and put them and the water pan in the smoker, fire it up and crank the heat to "high" to pre-heat while I get the meat ready.
Yesterday I pulled all the meats from their respective brines/smears and set them on sheet pans in the fridge to air-dry for about 24 hours.  Additionally, I tied all the cappos roast-style to help them hold a nice tight shape while smoking and really packed the outsides with my spicy cappo seasoning (See this post for details)  That just left setting the pieces up for hanging today.  I poked holes in a corner of each belly piece, using a butcher's steel, threaded some heavy cotton twine through and knotted a small loop.  I usually use paper clips for my hooks, simply hooking them through the twine and then hanging them on the smoker racks.
   

Time to load the hot smoker.  I put the shanks, ribs, and some of the chops on racks in the hot box, then hang the cappos below them and close up the box.  You want to keep open-door time to a minimum on the hot box - you don't want to vent any more smoke out then absolutely necessary plus even, constant, low temperature is the key to great results. I've read that you have to plan on adding a hour to your smoking time for every time you open the door.  This sounds a little extreme to me but it does emphasize the point well. I'll be shooting to keep the temperature in the hot box just under 200 degrees F today.
With the hot box going well it's time to fill the cold smoker.  I hung the belly pieces on a rack at the highest position, then fill the rack  with the chops and jowls, flip on the fan to start the smoke flowing from the hot smoker and snap on the lid.  It's going to be a little warmer outside today than Ideal for cold smoking (supposed to be in the low 50's) so I opened the damper in the chimney of the cold box to help keep heat from building up.  I've got temperature probes in place so I can track things throughout the day and I'm going to try to keep the temperature below 100 degrees F in the cold smoker.
  
After 30 minutes I adjust the heat down a little in the hot box.  Once they equalize, both boxes are sitting right at their design temperatures and they stay there the rest of the day without further adjustment. 
6 hours later, the meat is done!  The internal temperature of the biggest pieces are above 160 degrees F in the hot box and all of the pieces in the cold box look and smell perfect.  It's time to unload the smokers.
I put all the pieces on lined sheet pans and pop them in the cooler right away to start chilling overnight.  The next thing for most of them will be slicing packaging, and freezing. Oh yeah - and eating!
Cold smoked bellies (bacon)
Hot smoked chop
Cappo
Shank
Spare ribs