Search This Blog

Showing posts with label Opinions. Show all posts

Tuesday, April 11, 2017

An Unvarnished Job Description for a Line Cook

Are you tired of the public's romanticized ideas about what a cook or chef does for a living vs reality?  Me too. It seems to have gotten worse recently, but it is definitely nothing new.

Way back in the 1980s (well before the celebrity chef craze really took hold), I was working as Food and Beverage Director (F&Bat a hotel. They tasked me to rewrite the job descriptions for the positions in my department, including all kitchen, dining room, room service, and bar/lounge positions. I was then to present and discuss them with all prospective employees to make sure they were able and willing to do the jobs for which they were applying. 

Talk about re-inventing the wheel!  Can you imagine how many times my predecessors at his property (and every other F&B manager at every other hotel in the world) had done this same task?.  I thought it was a complete waste of time but, apparently, this onerous little task was an exercise designed to make sure that every F&B was intimately familiar with each of the job positions in his department. Well, I was more than familiar, having done most of them firsthand, so I went at it.

To be honest, I did a pretty half-assed job for all the service staff positions, and the bar positions and the dishwashers, etc. My heart just wasn't in it.  But for the cooks, the job positions I knew most about, I had some fun.  I ended up sending the GM a 2-page, single-spaced typed (remember typewriters?) document.  It went something like this…

Job Description for a Cook
The primary job for a cook is preparing the food served in our restaurants. Duties and work conditions include -
  • Cooks work in widely variable physical environments for extended periods of time including sub-zero degrees F while working/cleaning/stocking/organizing/ and/or inventorying in the walk-in freezers and 120 degrees F-plus temperatures on the hot cooking line. “If you can’t take the heat; stay out of the kitchen” is not just a cute saying.
  • The work environment for cooks is also usually slippery, often wet. Cooks must wear comfortable, grease-proof, non-slip, steel-toed shoes at all times in the kitchen.
  • The kitchen can be very cramped and is always full of very sharp tools and extremely hot equipment. 
  • Cooks can expect occasional cuts and burns at work. These are part of the job, and the cook needs to tolerate them with minimal interruption to the workflow.
  • Cooks must be able to stand on their feet working for 2 to 3 hours at a time under these conditions without a break during service periods. 
  • Cooks can expect to do a great deal of physical heavy lifting daily with regular tasks involving moving 50-lb (plus) containers up and down stairs, along narrow hallways and through the above-described wet/hot/cold/slippery environments.
  • The kitchen work zone is a fast-paced, intense, and testosterone-rich environment that can be adversarial. Exposure to "colorful language", "rich metaphors", "sexually charged" statements, and a certain amount of physical and mental stress that is out of place in most work environments is all in a typical day's work for cooks.
  • We also expect cooks to be available to work all weekends and holidays as these are the restaurant's busiest times.  Normal work shifts for cooks either begin at 5am or end at midnight (sometimes both).
  • While Cooks' shifts will technically include the periodic meal and shift breaks mandated by law, the nature of the business may prevent any time off the line during meal services. A management team member will sign you on- and off- shift if you are too busy to do it yourself.
  • We also inform you that cooks and chefs have the highest suicide and divorce rates of any profession except for law enforcement.

I broke down each of the individual positions (breakfast cook, dinner cook, prep cook, etc) in ridiculous detail, highlighting, in meticulous detail, every difficult or unpleasant task they might face.

The GM apparently didn't like my work very much and told me not to use my descriptions for my interviews. Imagine that!  Probably a good thing or I’d never have been able to get anybody but crazed masochists to fill my job openings.

The following year, they handed me a packet of generic F&B job descriptions to use.  They had sent them down from corporate headquarters, where the company lawyers apparently had a large part in writing them. The job descriptions were vanilla, vague and effectively useless as a hiring or training tool (but I guess it kept guys like me from getting the company in trouble).

Conclusion
But times have SO changed! Commercial kitchens are not at all the same places they were nearly 40 years ago. I'm happy to report that the job is NOTHING like this job description which is COMPLETELY outdated and TOTALLY unacceptable in today's sensitive, inclusive, modern restaurant paradigm.  <wink, wink> (psst, Hey buddy, want a sweet line cook job?)

Sunday, April 3, 2011

Roast Duck Dinner (From Post Office to Plate) - Part 4

Duck tonight!  Time to do the "final assembly" of all the components for our duck dinner, at last!
Three days have passed since we butchered the first duck and I start the day with 6 VERY nicely cleaned,  plucked and rested,  feet-on ducks.  I figure I have just enough room in my commercial convection oven to roast them all at the same time.  This allows me some economies of scale and conservation of energy consumption.
The first step is to make up a big batch of aromatic-rich mirepoix.  I used 2 lbs of carrots, one large head of celery, four medium onions, and one head of garlic,   I chopped all of this coarsely and added about a cup of fresh rosemary leaves, some salt and ground black pepper and tossed it to mix well.
Rough Mirepoix
To prepare the ducks I cut off the feet, necks, fatty skin flap around the neck and knuckles off the legs.  These all go on the bottom of the roast pans along with a little of the mirepoix. I then folded each wing back onto itself, tucking it under the body.
Next I filled the body cavity of each duck loosely with the remaining mirepoix, rubbed the exteriors with a little dark soy sauce, arranged them, breast side up, in the roast pans and popped them in the preheated 350F oven.
While the ducks cooked I started the wild rice pilaf that would accompany them at dinner.  I started by measuring out 2 cups of wild rice, covering it with water in a small sauce pot and bringing it to a boil then quickly draining it ("blanching"). 

While the rice blanched, I cut up another aromatic mirepoix (carrots, celery, onions and garlic), this time diced about 1/4" (garlic fine chopped) and began sautéing it in a little butter.  When it was almost soft I added some chopped thyme and rosemary to cook for a minute or so before removing it from the heat. I brought 8 cups of well-seasoned chicken stock to a boil.
I put the blanched and drained wild rice in a lightly oiled 2" hotel pan, stirred in the sautéed mirepoix and poured on the boiling stock. A quick stir to distribute everything evenly, then I covered the pan with plastic wrap followed by aluminum foil and popped it in the oven.
Back to the ducks.  After about an hour I turned each of the ducks so they were breast-down.  The mirepoix was browning nicely but not getting too dark so back in the oven they all went.
I checked the rice after an hour in the oven and it still had a ways to go but was coming nicely.
After the second hour in the oven for the ducks they got flipped again (breast side up again).  I often find that with store-bought ducks they are very close to being done at this point and a little crisping of the breast skin is all that is needed. These ducks were not nearly ready yet.  I suspect it was because of their age (quite a bit older than commercially prepared birds) but for what ever reason, they needed some more quality time in the oven.  The mirepoix was darkening and there was very little liquid remaining in the bottoms of the roast pans so I added a little water to each to prevent scorching.
To my surprise, the ducks took nearly another hour to cook sufficiently at which time I took them out, removed them from the pans to cool. 
I then set about deglazing the roast pans on the stove over hot flames with some red wine and water, scraping up all the brown bits. This would all go toward making the stock that would be made into a sauce for the ducks so, the deglazing liquid went into a stock pot with the feet, necks and mirepoix from the pans.  
deglazing a roast pan
I covered the parts with more water and put the pot on the stove to heat while I continued working with the birds.
By this time the rice was fully cooked and very fluffy.  I poured it out of the hotel and onto a sheet pan to cool, then put into the fridge.  I've found that wild rice will tend to sour if not cooled and chilled quickly after cooking.
Once cool enough to work with, I de-boned the ducks.  Starting by tearing off the first two joints of each of the wings, then cutting each bird in half through the backbone and breast and removing the mirepoix from the cavities (goes into the stock pot) 


I proceeded to pull out all of the now-exposed rib, back, hip and breast bones, being careful not to tear the meat or otherwise mangle the birds.  Most of the bones (which of course also go into the stock pot) came out easily so all that was left in each half was one leg bone, one thigh bone and one wing bone.  This makes the duck halves sit nicely on the plate, be very easy to eat and gives me more bones for the stock!

mostly-deboned duck half
The duck halves then went into the fridge to chill while the stock cooked.
All My Ducks in a Row
After about 6 hours at a low simmer, the stock was a rich brown color, smelled great and some of the bones were just beginning to fall apart.  
Duck Stock Simmers
Time to strain. After removing as many of the larger bones as possible I strained the stock first through a coarse china cap (conical colander), then through progressively finer mesh strainers and finally through a sieve lined with cheesecloth.  
I skimmed off as much of the fat as possible (reserved for other uses) and cooled the nearly-clear stock in an ice bath before moving it to the fridge to finish chilling.
Time to make the sauce.  Duck L'Orange is the classic preparation for roast duck with a rich orange-flavored sauce but the same technique can be used to make any type of fruity sauce.  Today I was going to make one with blackberries.
I started by making a piquant caramel by combining sugar and red wine vinegar and cooking it to a thick syrup and then to a medium brown.  This base is what will give the sauce much of its sweet-and-sour kick.   

Piquant Caramel for Sauce
While the caramel was reducing I pureed some previously frozen blackberries with an orange.  These I added to the caramel when it reached just the right point to stop the cooking process (CAUTION! This is a little tricky and can cause violent sputtering of the molten sugar if you are not very careful). 

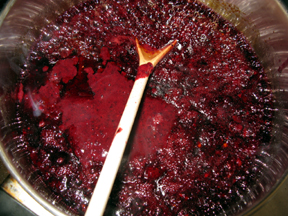
I cooked the blackberry/caramel mix a bit longer to further reduce and concentrate the flavors then strained the base through a fine sieve to remove the berry seeds, pressing to get every drop of base I could.
I retrieved the cold stock from the fridge, skimmed off the little bit more fat that had congealed on the surface and put some stock in a small sauce pot.  I added some of my blackberry base and began heating the mixture.  There are any number of options for thickening this sauce but arrowroot is usually my tool of choice.  I like the glossy, semi-clear look of the finished sauce but in this case I thought I'd try something a little different.  I made a quick roux from some of the reserved duck fat and flour and also dissolved some cornstarch in cold water and used a combination of the two as my thickeners.  The result was interesting.  It had the full body and mouth-feel of a demi-glace brown sauce but also the sheen of an arrowroot sauce.  I liked it.  A bit of tweaking of the flavor (touch more thyme, little more vinegar at the finish) and the sauce was good-to-go.
Putting it all together.  It's almost dinner time but these are big birds and we've been picking at the roast duck bones all day so we opt to have just 1/4 duck each tonight.  The duck half goes onto a sizzling platter, skin side up, with a little water on the bottom (to prevent drying of the exposed meat) and into a 450F oven.  This will heat it through and crisp up the skin in about 10 minutes.  In the mean time I reheat some of the wild rice in the microwave, and make sure the sauce is hot and ready.
Once the duck was ready it was time to eat!  I added a few sliced tomatoes, fresh from our green house to complete the plate.  At last, our own duck dinner!
It was absolutely worth the work and the wait but now you know why, when I buy a frozen duck at the grocery store, Kathryn calls it a "convenience product" or even "fast food"!

Thursday, March 31, 2011

Roast Duck Dinner (From Post Office to Plate) - Part 3

The following day brought a fresh perspective, some new ideas and much better weather.
In evaluating the previous day's successes and failures we decided that:
1.  We needed to scald for longer than we thought and at a much higher temperature than is generally recommended. We think this is because our ducks are older than most that are harvested commercially.
2.  The ducks seemed to continue to loosen their feathers for a while after coming out of the scald so we would try streamlining the process through scalding on all of the birds were were going to do and then concentrate on removing the feathers as a separate project.
3. We needed to resign ourselves to the fact that if we wanted skin-on ducks there was going to be a serious amount of hand plucking work involved.  There was no magic gizmo (at least not within our reach) that was going to miraculously de-nude the birds completely.  Further research into commercial duck processing came across some other techniques that might have applicable merit.  One method: the easy feathers were removed after scalding and then the ducks were dipped into molten paraffin wax then into ice water to harden the wax which was then peeled off - taking with it most of the remaining feathers - sounded promising but it required a LOT more of the wax than we had on hand for this session.
After setting up our various stations for the day (see previous post for details) we decided to kill and scald 4 birds in short succession then work together on the plucking.  That would give us a total of 6 in the fridge.  Plenty to see if this was all going to be worth it.
Work progressed smoothly.  After killing and bleeding-out, we scalded the birds in the soapy water at 170-180F for a full 3 minutes and by the end some feathers were almost falling out on their own.  A quick check showed no signs that it was cooking the ducks.  Once all four were scalded and piled in a large bus tub, I began working on them with the Hillbilly Plucker.  They were still quite hot and the plucker got off a lot of feathers.  When the first one was as done as I could get it, Kathryn started the hand work on it while I "HIllbillied" the rest.
By the time I'd finished pre-plucking all four, she had the first one almost done.  Things were definitely going faster but it was still very fussy work.  Despite our super-scald, some of the feathers were still so well anchored we had to pull them with needle-nose pliers. Working together we plucked three of them until as done as possible, sometimes exchanging the birds we were working on.
"Here.  You take this one for a while.  I'm tired of looking at it"
Once the first three were done I started the gutting and Kathryn finished the last one.
When all four were plucked, gutted, washed off and in the ice bath we, again, moved inside to finish the work of peeling feet and singing hair (and pulling the occasional missed feather here and there).
All in all it took us about 4 hours to process the four ducks today and get them in the fridge to rest.  Half the time per-bird of the previous day's efforts, but still a lot longer than we had hoped.
Two days in the fridge and the ducks should be nice and relaxed and I can start treating them like food!

Wednesday, March 30, 2011

Roast Duck Dinner (From Post Office to Plate) - Part 2

The thing about eating roast duck is that you really need that nice crispy skin to complete the dish as a whole.  We raise and butcher about 30 Cornish-Rock cross cockerels (male chickens) a year.  They are an amazing meat bird going from hatchlings to table in 8 weeks or less.  Their feed conversion rate is astounding with most of what they eat going directly into muscle growth.  Anyway, when we butcher the chickens we skin rather than pluck their feathers.  It's very fast, easy and have never missed eating the skin even once.  I knew this wouldn't be so with the ducks.
Plucking birds is messy hard work, and especially so with waterfowl like ducks.  The traditional way to pluck birds is:  Kill and bleed the bird, give it a quick dip in very hot water, yank out the feathers.  There are a number of poultry plucker machines of various sizes and duty ratings available to help with the "yanking" part.  They range from several hundred dollars to a few thousand. We were only planning on butchering out 10 drakes at most and it didn't seem to make any sense to invest in any of these machines.  On the other hand, we knew all-hand plucking was going to be a real chore. 
A little online research came up with a  gizmo variously called a "slum- ghetto-, or hillbilly-plucker".  It was a home-made attachment for an electric drill made from a PVC pipe fitting, some rubber bungee straps and a bolt. There were a few YouTube videos of them in action and they seemed effective (on chickens at least) so I splurged on $20 in materials and cobbled one together.
Scalding the birds is also messy and the whole process is much better done all outdoors.  These ducks were getting BIG and I was going to need my big 15-gallon stock pot for the hot water.  Well I didn't have any kind of burner big or sturdy enough to hold that pot except for my candy stove and NO WAY was that going outside for a slaughter day!  Online shopping to the rescue again and I found a very nice LPG Cajun Cooker Burner designed for handling large crawfish-boil dinners.  Perfect. Pass the credit card, please and thank-you.
Once all the necessary equipment had been delivered, built or, otherwise readied we set the date and prayed for good weather. 
The night before Slaughter Day we closed as many of the ducks as we could wrangle into the chicken coop area and took away their food. This makes for a much cleaner butchering experience and lessens the severity of one of the many unpleasant aspects of the process (the gutting).
The following morning, as soon as possible after all the morning chores, we set up our poultry processing station near the pen where the birds were being held.  I'm not going to go into great detail about our set-up(see pictures below) but there were the killing cones, the scalding station, the hillbilly plucker station, the hand/finish plucking table, the gutting station and various washing and chilling buckets, tubs, knives, cutting boards, thermometers, timers etc. 
Our plan was to catch and kill the first duck and while it was bleeding out, catch and kill a second.  We would then take the first and scald/pluck and gut it while the second one bled.  The first one would go into the ice bath to chill and we'd scald/pluck and gut the second one.  With any luck we'd be able to get a third one killed and hanging somewhere during all of this and just keep working our way through all the drakes we'd selected.
<Sigh>  My wife has a saying "People plan: Goats laugh".  It's a reference to the fact that despite all best efforts goats will usually come up with a way to outsmart/outmaneuver/out-something we humans with the theoretically more highly developed brains and those marvelous opposable thumbs.  This day the people planned and the ducks laughed.
To start with, the weather could have been better.  It was way too windy for comfortable outdoor work, making everything harder than it should have been.  The plastic wrapping on the stand for the killing cones was flapping all over the place, the burner for the scalding pot kept wanting to blow out etc.  It's a busy time of year for us  and we weren't exactly sure of when the next opportunity for a couple of open days for a project like this might be, so we forged ahead anyway. 
The first part of the plan went flawlessly the ducks were easy to catch and calmly went to their demise.  We were concerned that the killing cones we had made years before for chickens would not be big enough for the ducks but they worked perfectly and the first two volunteers died quickly and cleanly, bleeding out well without any fuss or drama. 
  
Next up: Scalding...
Remember I mentioned that plucking waterfowl was especially messy and difficult?  I'd read that in a book.  A couple of books, actually. I had NO IDEA how difficult they were talking about!  Try just this side of impossible!  The best info I could glean suggested scalding for maybe a minute in 140 degree water "just until the tail feathers come out easily". Ha, ha, ha, ha. Very funny! One minute in the hot water and the tail feathers wouldn't budge. Two minutes and one feather came out with extreme effort.  Three minutes and a small handful did come out as did some of the large wing feathers.  I was afraid that any longer and I was going to have boiled duck. 
Onto the Plucker...
I'd mounted the drill-wielded Hillbilly Plucker on one of the forks of my tractor's forklift attachment.  It was as solid as a rock and I was able to set it at a comfortable working height.  There was no easy electricity where we were working so I'd brought over one of our portable generators to power the drill.  It fired up on the first pull and the plucker spun into life but after a few minutes of trying to hold the very heavy, soggy and hot bird against the flapping fingers I realized that this was not going to be as easy as all those YouTube videos had made it look. In the videos they were, of course, plucking chickens and the feathers absolutely FLEW off them, leaving 95% denuded carcasses in about 2 minutes flat.  Definitely not so rewarding with ducks.
After several very soggy minutes of holding the bird against the flappers I'd gotten off maybe 40% of the feathers and had gotten completely soaked in the process.  Imagine that: soaking wet bird meets fast-flying-fingers.   At least as time went on it was cool water instead of very hot water I was getting sprayed with.  Anyway, I tried with the grain, against the grain and  perpendicular to the grain of the feathers, but nothing gave that satisfying cloud of flying feathers I had been hoping for.  I was making progress especially on the middle-sized feathers (the big ones definitely needed hand pulling and the tiny fluff feathers seemed determined to stay no matter what) but it was slow and tedious. 

After another few minutes of work we decided that the bird was as plucked as this method would accomplish so we moved it to a table and Kathryn started hand working it while I scalded the second duck.  I'd left the burner under the scalding pot on full blast and despite the wind fighting it the temperature had gone up quite a bit during the protracted plucking work.  It was almost to 170F but I figured "What the Hell..." The lower heat wasn't great so what did I have to lose?
Again with the timer... one minute - nothing, two minutes - barely a budge on the feathers, three minutes - seemed about right again so off to the plucker we went.  This time I actually did get a couple of explosions of feathers off the bird and the plucker was definitely getting more of the feathers off with less work.  After a couple of minutes I had about 80% of the feathers off (which sounds pretty good until you think about the remaining 20% as being the hardest ones still needing to be dealt with).
By this time Kathryn had about half the first bird once-over hand plucked and it was starting to look a lot more like food than road kill so I joined her and we each worked on a bird until they were close to done.  We figured we could fine-tune them inside, out of the elements, so I quickly gutted them (saving the hearts and livers), tossing the heads to the dogs.  
After a fresh water rinse we transferred the ducks to an ice water bath and moved the operation indoors.
Inside, in more comfortable working conditions, we were able to get the rest of the stubborn feathers persuaded out, get the feet peeled of their outside skin layers and, using a Mapp gas torch (hey, it's all I had), singed off the remaining hairs.
Finally they looked like something that belonged in a kitchen and I had hopes that this whole fiasco was going to be worth it.  Maybe.  Time expended: 4 hours for two people to ready 2 ducks.  Ridiculous!  The ducks went into the fridge for their resting period (time to allow the muscles to pass through rigor mortis).
We obviously needed to improve and refine our technique but were way too beat to try any of our new ideas until the next day.