Search This Blog

Saturday, February 5, 2011

Meat Grinding and Sausage Making 2011 - part 3

What ever should I do today?  Oh!  I know!  Make more sausage!  It's day four of working on my grinding & sausage making projects for this week.
Today the plan is to make the hotdogs (final emulsifying, and stuffing into casings) and prepare both the hotdogs and Andouille sausages for smoking tomorrow. I also want to get all the  other finished sausages and ground meats packaged and in the freezer.
The hotdog meat mix has already been ground twice and all the various seasonings and other ingredients incorporated.  The mix is well-chilled so the next step is emulsification. I'll be doing this in my heavy-duty 14-cup food processor and the procedure is simple: process the meat mix, adding a little ice water as it mixes until it reaches the proper consistency. The ice water keeps the meat mix from heating up too much with all the friction created during the processing, adds moisture to bring the mix to the right thickness and soften the mix so that the food processor can physically do the work. 
So, I put a few large scoops of meat mix in the food bowl fitted with the large steel knife, seal it up and begin to process the meat.  The bowl is only about half full and despite being a powerful machine, and being fairly new it begins to bog within a few seconds.  I add some ice water in a steady stream through the feed tube which helps but the machine is still working hard.  I switch to "Dough" mode which helps.  I keep processing, adding water regularly and stopping to scrape down the bowl a couple of times until the mixture looks smooth and uniform.  You'll notice I didn't say "looks good" or "looks pretty".  Honestly, it's pretty gross looking at this point.  Total processing time: about 3 minutes.
   

I continue processing the meat in batches, transferring the finished emulsification to a bowl to await the next step.  I processed 5 batches (and had two more to go) before deciding to start stuffing the filling into casings and give the food processor a rest.
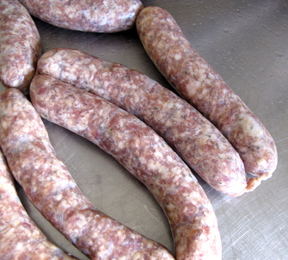
After taking a little while to sort, soak, and wash the sheep's casings, I filled the hopper of my hand-cranked sausage stuffer, threaded the first casing onto the smallest nozzle and began pumping out hotdogs.  I prefer "foot-long" dogs so I twisted them off at 8 to 9" intervals.  I repeated this until I'd used up all the filling, emulsified the rest and then filled casings with that mix too.


The hotdogs will be smoked tomorrow so I cut and tie-off the links into strings of 4 to 6 pieces and hang them to dry at room temperature overnight. While I was at it, I also hung out the Andouille sausages which are also destined for the smoker in the morning.  The hanging dries the casings slightly letting the smoke "smudge" stick and penetrate more easily.
 
I'm too impatient to wait for a smoked dog so I cooked off a couple, just pan-frying them from raw, for lunch.  They weren't bad but the smoking will definitely add another dimension.  Can't wait for lunch tomorrow!
We also got all the previously processed ground meats and sausages packed, labeled, and frozen . A good day's work all around.

Friday, February 4, 2011

Meat Grinding and Sausage Making 2011 - part 2


I was able to get back to the kitchen today and continue my meat grinding and sausage making projects. I had gotten the beef ground yesterday, and the first grinding on the lamb & various sausage mixes done the day before that.
Today I started with grinding again, getting the ground lamb finished followed by the second grind on all of the sausage mixes. Then it was time to start stuffing the sausage meat into casings.
Ground Lamb
When I talk about "casings" i mean, of course, intestines.  I buy two sizes of casings; 32-35mm hog casings for Italian, Hungarian, and Andouille sausages, and 23-25mm sheep casings for breakfast sausages and hotdogs.  They come well-cleaned and heavily salted in hanks of any number of random length pieces.  As a general rule you need about 2' of 32-35mm casing per pound of meat and about 3 times that for the smaller sheep casing.
 
 
In order to use them they need to be soaked to remove the salt and soften the tissue.  I've heard that putting a little vinegar in the water helps with the softening but I've never had trouble doing it without.  After a soak and rinse, each piece needs to be opened at one end and a little  cold water run into the opening.  The ball of water is then slid down the whole length of the casing by picking up the opened end until it runs out the other end.  This slicks up the inside so it is easier to  slide onto the sausage stuffer and ensures that there are no obstructions, knots or tangles. You want to work organized here so that all the different casing pieces don't get tangled together.  Leave them in the water with a small piece of one end hanging out of the water (so you can find it easily again) until you need them.
 
Here's my sausage stuffer.  It has a cylinder hopper for the meat mixtures and a hand crank that lowers a piston into the cylinder, that pushes the meat out of a hole near the bottom.  The hole  is fitted with one of several nozzles (different diameters for different sized casings).
 
Once assembled and the hopper filled, one piece of casing is carefully opened and slid over the nozzle until all of it is accumulated along its length except for the last couple of inches. If the casing pieces are very short you can thread several on at once. A knot is made in the end that was left hanging and then it is snugged up to the end of the nozzle.  There should not be any excessive air pockets or water left in the casing or it will make pockets in the sausage.


To make the sausage links, the crank is slowly turned with one hand.  As the casing fills, the other hand supports the sausage and slowly pays out the casing so as to regulate how much filling goes in.  Too much filing and the sausage will burst, too little and the casing will be flabby.  Depending on the types of sausage, the filling action is suspended periodically so that individual sausages can be twisted off.  The trick to this is to alternate each twist direction so the whole string doesn't unwind itself.  I know this sounds counter intuitive but it works.
 
Re-fill the hopper as necessary.  Once you get to the end of one casing, a knot is made at the end of the last sausage, the next casing is loaded on the nozzle and the process repeats until you're done.  Today, I got all of the sausages done into links except the hotdogs/wieners/frankfurters which still need to get emulsified tomorrow before stuffing into casing.
Italian

Hungarian

Breakfast
The sausages should, of course, get popped back into the fridge right away and eaten within a few days or packaged and frozen as soon as possible.

Thursday, February 3, 2011

Meat Grinding and Sausage Making 2011 - part 1


Yesterday I got a good start on all the meat grinding and sausage making I wanted to do this week. 
I got 60 lbs of beef, 40 lbs of pork and 24 lbs of lamb all run through the grinder the first time.  I grind all my meat twice, first using a die with 1/2" holes, then later with a smaller die (size varies depending on the use or type of sausage it is destined to become).
This time I was grinding meat from several different butchering sessions last summer and fall, so the meat had all been frozen.  I really like working with frozen meat for grinding because I can purposefully thaw the meat only part way before processing it.  The meat was perfect; pliable but still with lots of ice crystals in the muscle. Having the meat "hard chilled" makes it cut cleaner without mushing the fat at all and also counteracts any heat build-up from the friction of the process. Keeping the meat as cold as possible reduces the chance of problems from bacteria.
So, starting with 124 lbs of well-chilled boneless meat, cut into strips 1"x1" or smaller (any length), well trimmed of any sinew, silver skin, excess fat, glands etc. I set-up my meat grinder.  It's an attachment for my 20-qt mixer that is powered by the PTO (power take-off) hub on the front of the machine.  The grinder is basically a funnel for directing the meat to a screw drive that pushes the meat through a stationary heavy metal plate with holes cut in it.  A 4-bladed knife (which I sharpen regularly) rotates on the screw drive and against the plate, cutting off the meat as it is pushed out
Here are some pictures of the parts and assembly...
 

I set the mixer to a medium speed and, using the "pusher" started feeding meat, a little at a time, down the chute into the grinder.  The first grind is very easy and the meat practically flies through the plate into the waiting tub below. The meat is nicely cut into a very coarse grind so I proceed and process the all the beef, pork, and lamb in about 2 hours, immediately getting it back into the fridge as soon as possible.
 

After clean-up I still had enough time to make my sausage mixes. This week I'll be making 10 lbs of Andouille (a smoked Cajun sausage), 10 lbs Sweet Italian. 10 lbs of Fresh Hungarian, 10 lbs of Pork Breakfast, and 10 lbs of Hotdogs/Wieners/Frankfurters.
While the ingredients and ratios vary for the different sausages the method is the same for all: Measure the seasonings, mix them with a liquid, mix the seasoned liquid with the coarse-ground meat, chill thoroughly (preferably overnight), re-grind through a smaller die, stuff into casings (optional), smoke (if appropriate),  eat or package and freeze.


I got all of the sausage mixing done yesterday in anticipation of re-grinding and stuffing today but I wasn't able to get any of it done except re-grinding the beef for hamburger (and in time for lunch too!)
 

The rest of the sausage making will have to wait until tomorrow.  I hope.
If this whole grinding-sausage making thread bothers you, just wait...  Next week we'll be making some laws!

Wednesday, February 2, 2011

The Big Braise


Some days are just perfect for spending the whole day in the kitchen, making good smells and heating up the whole building with lots of cooking projects.  Today was just that kind of day. It was snowy on-and-off all day and cold (high of 15F) with gusty winds.  An excellent day not to go outside more than absolutely necessary.
In addition to starting the grinding and sausage-making work on 124 lbs of beef, pork and lamb (more on that soon) I had 4 very large beef shanks from a steer we'd butchered last summer that needed something done with them and I had pulled 4 lbs of cubed steak (from the same steer) for making a big pan of Swiss Steak.  Both would be braised dishes and the projects would mesh well so I got both going first thing this morning.
Mexican-style Shredded Beef
I decided to make Mexican shredded beef from the shanks so I heated some fat in my largest braising pan and seared each shank well on all sides.  They barely fit in the pan. When done I removed them to a 4" deep hotel pan and seasoned them well with salt, garlic and ancho chile powder.  Next, I rough-chopped 6 medium onions and poured them over the shanks and topped that with 1/2  of a #10 can of chopped tomatoes in juice then added about 1/2 gallon of water to the pan.

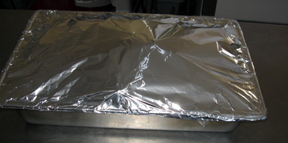
I covered the pan with plastic wrap, then sealed the pan well with heavy aluminum foil. I used the plastic because the acidity from the tomatoes would have eaten through the aluminum foil during the long cooking process, making holes and probably leaving a nasty grey sludge on pieces of my meat.  Steam from the cooking liquids will keep the plastic from melting.
The big pan of shanks went into my convection oven at 275F and stayed there, slow-cooking for about 8 hours.  It was hard not to peak at it because of the great smells after the first couple of hours.
When it was done I removed the shanks and meat (much of it fell off the bones when I touched it) to a sheetpan to cool, poured off the extra fat from the braising pan and deglazed it on the range with a little water. 
Once almost cool enough to work with I carefully picked through the meat, discarding sinew, cartilage and bone pieces, leaving just the dark, rich meat.  It will chill overnight to be shredded tomorrow.
The pan drippings went into the fridge to chill overnight.  Tomorrow I'll skim off any fat and combine the remaining liquid and braised veggies with the shredded meat, and pack it in zipper bags for the freezer.
Swiss Steak with Vegetable Gravy 
I took the 4 lbs of cubed steak, dredged them in highly seasoned flour and pan fried them in bacon fat until well browned.  While they were cooking I rough-chopped a few onions, half a dozen carrots and about half a head of celery.  When the meat was done I removed it to another pan, drained off the excess fat and sautéed the chopped vegetables with some leaf thyme, garlic and a couple of bay leaves.


Once the vegetables were soft I added a half #10 can of chopped tomatoes in juice and some water to deglaze the pan, scraping up all the nice brown bits that had stuck to the pan bottom.  When that was all bubbling nicely I added the meat back to the pan, added a bit more water to make sure the pieces were covered, turned the flame down to its lowest possible setting, and covered the pot.  I let it simmer for several hours, stirring periodically, until the meat was almost-falling-apart-tender.  By then the sauce had thickened nicely.  A few more minutes of cooking uncovered reduced it to exactly where I wanted it to be.

I chilled most of the Swiss Steak in the fridge, just keeping out enough for our dinner tonight, to be accompanied by some mashed russet potatoes.